How to Convert PDF to JPG Without Losing Quality
Nothing is more frustrating than converting a crisp, clean PDF document into a blurry, unreadable image. You've likely experienced it: you upload a file to a standard converter, and the resulting JPG looks pixelated and cheap.
This happens because most standard converters aggressively compress files to save space, often dropping the resolution to 72 DPI (web standard).
To get a high-resolution conversion, you need to control the DPI (Dots Per Inch). This guide will show you exactly how to convert PDF to JPG at 300 DPI or higher so your text remains sharp and your images stay clear.
The Secret Ingredient: Understanding DPI
Before you start, it is vital to understand why your images look bad.
72 DPI: This is the default for most screens and free online converters. It is small and fast but looks blurry when zoomed in or printed.
300 DPI: This is the Gold Standard for print and high-quality archiving. It contains over 4x the data of a standard web image.
If you want to convert PDF to JPG without losing quality, you must use a tool that lets you manually set the DPI to 300.
Method 1: The Best Free Method for Mac (Preview)
If you own a Mac, you already have one of the best high-resolution converters installed: Preview. Most people miss the hidden resolution setting in this tool.
- Open your PDF in Preview.
- Go to File > Export.
- In the "Format" dropdown menu, select JPEG.
- The Critical Step: Look at the "Resolution" box. It will likely default to 72 pixels/inch. Change this number to 300 (or 600 for extreme detail).
- Slide the "Quality" slider to the far right (Best).
- Click Save.


Result: A Top-Tier Solution for Batch Needs. macOS does come with a native PDF-to-JPG converter, but it has a major limitation: it can only handle one page per conversion. If you need to export multiple pages from a PDF, you'll have to manually repeat the operation over and over.
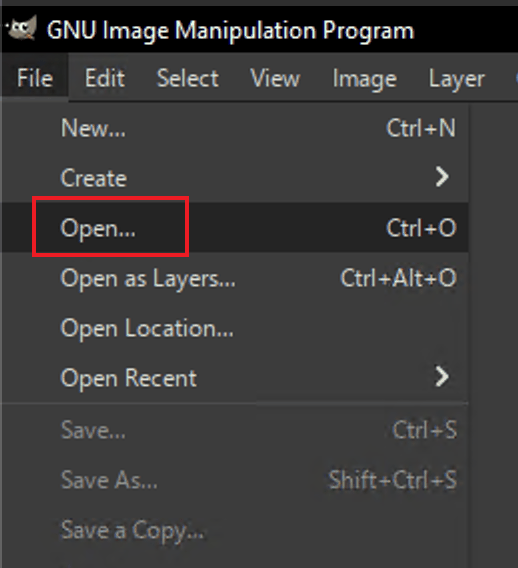
The Best Free Method for Windows (GIMP)
Windows does not have a built-in tool that allows for high-DPI conversion easily. The best free route is using GIMP, a popular open-source image editor.
- Open GIMP and go to File > Open. Select your PDF.
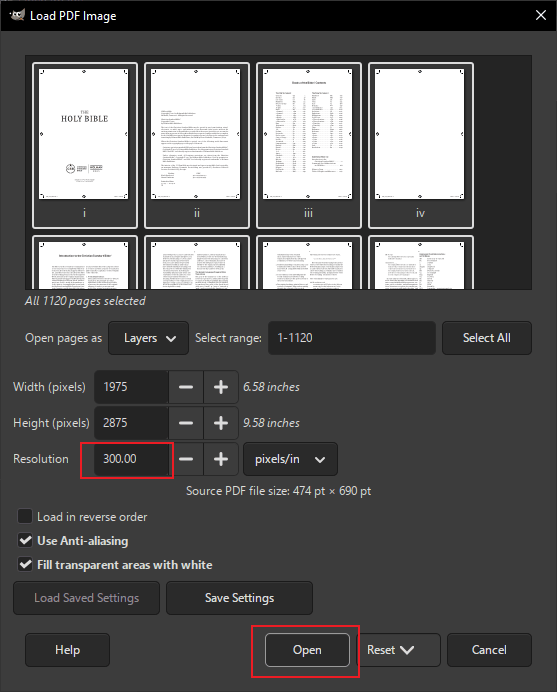
- A "Load PDF Image" dialog box will appear.
- The Critical Step: Under the "Resolution" setting, change the value from 100.000 to 300.000.
- Click Open. Your PDF pages will load as layers.
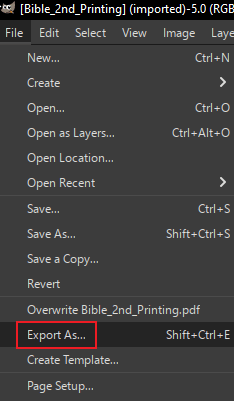
- Go to File > Export As.
- A "Export Image" dialog box will appear. Select JPEG, and click Export.
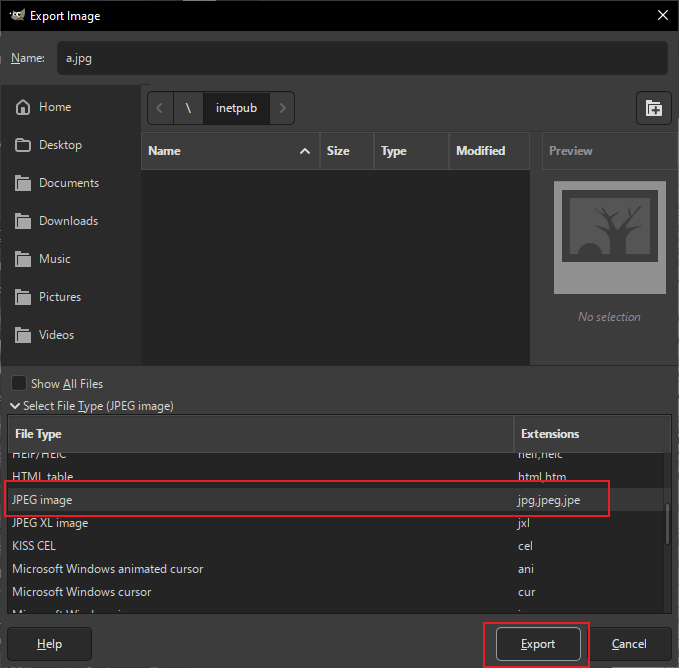
Result: You get the exact same quality as expensive professional software, completely free. As the same as the method on Mac, it also can only export an JPG image one time.
Method 3: Use pdftoppm command-line utility
pdftoppm is a powerful command-line utility, part of the poppler-utils package, that converts PDF pages into image formats like PPM (Portable Pixmap), PGM (Portable Graymap), PBM (Portable Bitmap), and even PNG or JPEG using options, creating separate image files for each page with customizable resolution, cropping, and scaling. It's essential for batch PDF-to-image conversion in scripting and automation, offering fine control over image quality and size. The command line offers a straightforward way to convert PDF pages to JPG—no graphical interface required, just a simple command.
>pdftoppm -jpeg in.pdf prefix
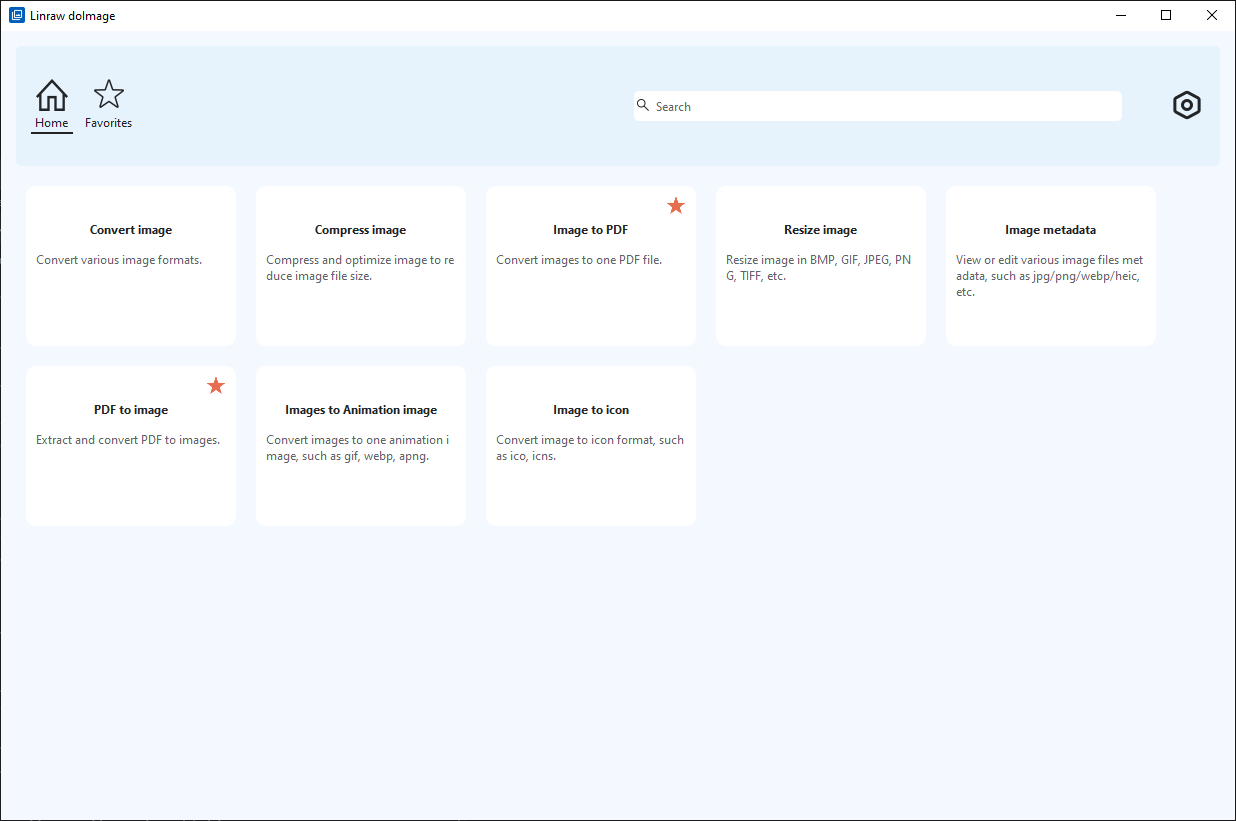
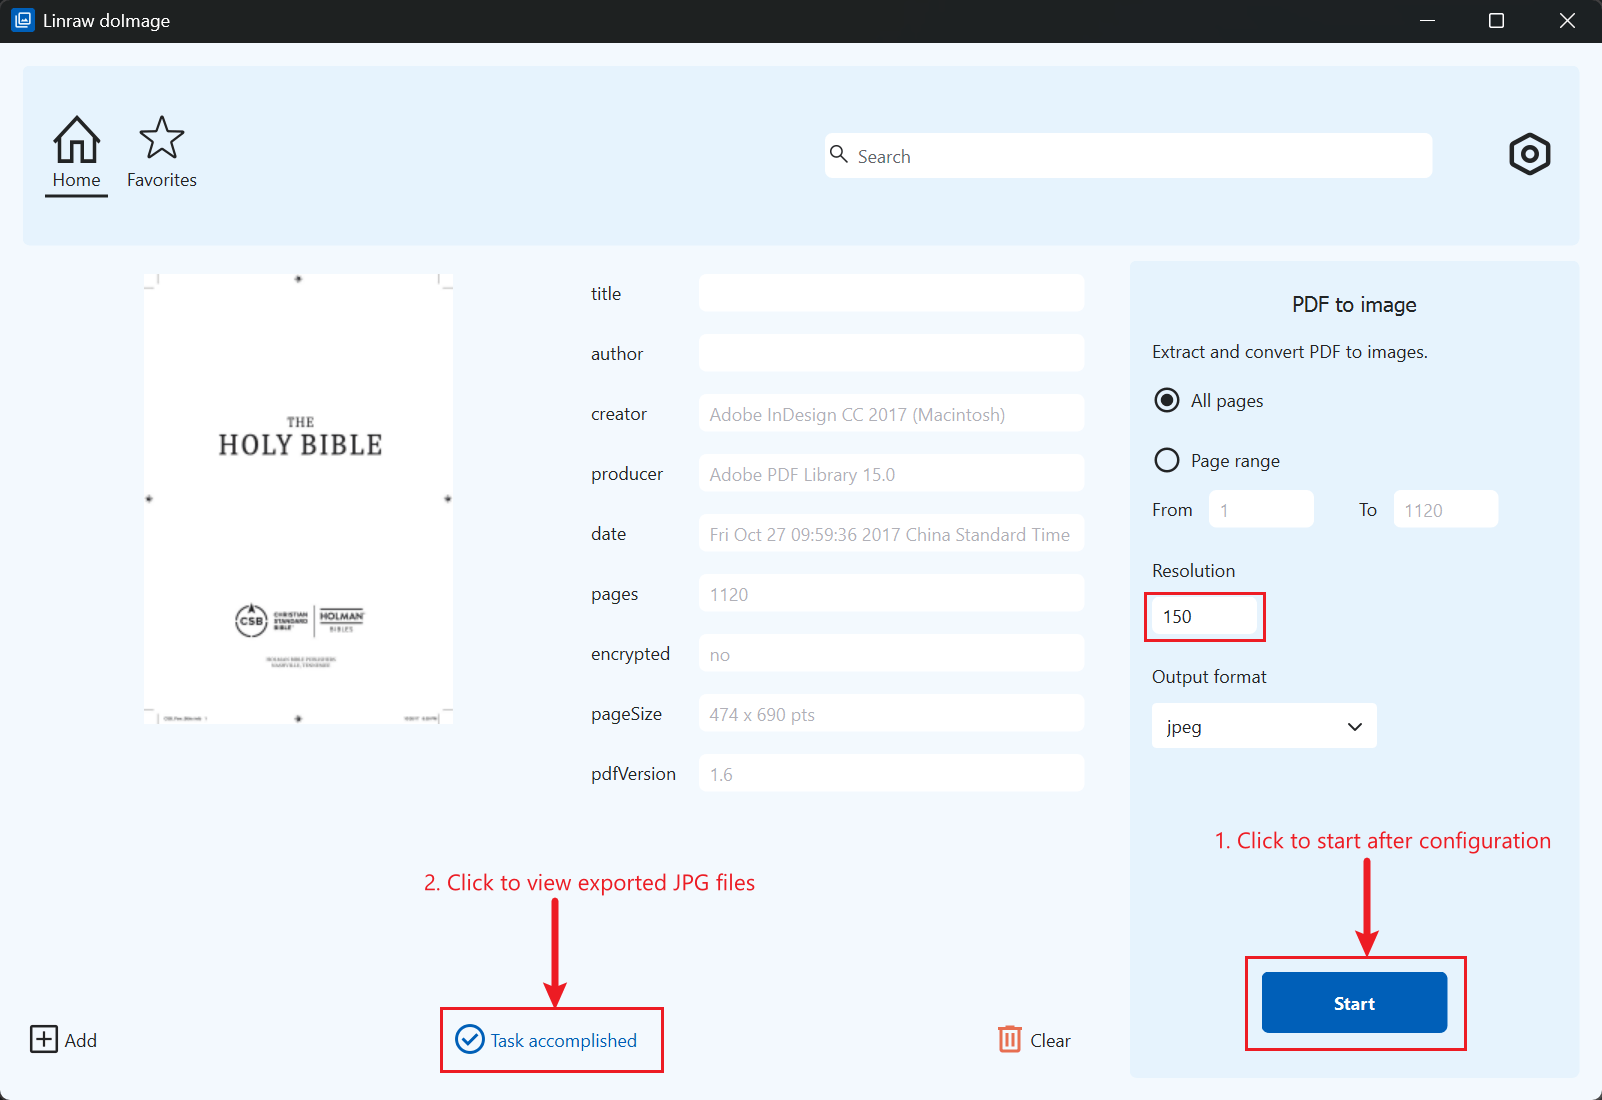
Method 4: The Best Method using Linraw doImage
Linraw doImage is a powerful all-in-one image toolkit, and its PDF to JPG feature is a game-changer for efficient file conversion. It enables batch processing of multiple PDF pages into high-quality JPGs, saving you plenty of time and effort.
Using it is a breeze—here's how:
- First download and install Linraw doImage.
- Open the software and click to access the "PDF to Image" utility.
- Add your PDF files, adjust the conversion options to your requirements, then hit the Start button. In just a short while, your converted JPG images will be ready.
Conclusion
If you want to convert PDFs to JPGs with top-tier quality, Linraw doImage is the best bet. You can tweak the settings before converting: choose to export all pages or just a selected range, adjust the resolution, and pick your preferred image format. It's totally worth giving it a go.
Try Linraw doImage FreeTroubleshooting: Why is my JPG still blurry?
If you followed the steps above and your image is still low quality, one of these two issues is likely the culprit:
1. "Garbage In, Garbage Out"
If the original PDF was created from a low-quality scan or a blurry screenshot, increasing the DPI to 300 will not fix it. You cannot add detail that wasn't there to begin with. These methods only preserve the existing quality of vector text and high-res images inside the PDF.
2. The Text Problem (JPEG vs. PNG)
JPEG is a "lossy" format, meaning it is designed for photographs, not text. Even at high quality, you may see "artifacts" (fuzziness) around sharp letters.
Pro Tip: If your document is mostly text and looks dirty as a JPG, try converting it to PNG instead. PNG is "lossless" and handles text edges much better than JPG.
FAQ
Q: Why do my PDF to JPG conversions look blurry?
A: Most converters default to 72 DPI. To get a clear image, you must manually set the resolution to 300 DPI.
Q: What is the best resolution for PDF to JPG?
A: 300 DPI is the industry standard for high-quality images and printing.
Q: Is JPG or PNG better for PDF conversion?
A: Use JPG for photos. Use PNG if your PDF contains a lot of text, as it prevents "fuzziness" around the letters.
